|
The first thing you will need to do when setting up an e-commerce
store is to set up the general store settings. This section
will guide you through the simple steps you need to follow.
Read through it and complete the basic setup of your e-store's
main page in a just few minutes!
In order to do so, access the general settings
administration panel from the "Setup > General"
tab:

| Figure:
Setup your e-store's
general settings by choosing "Setup > General"
in the Administration Panel. |
You are now in the General settings page.
You will notice that this page is organised in two different
sections: one for defining your language depended settings
and another for organizing general settings common for
all languages. Each section has several fields that need
to be filled in so we will go through each one of them explaining
what you need to do.
Language
depended settings:
The first section in the General settings page
will be used to define basic information about your company
such as Company name, Company address etc. This information
is given by filling in the following form:
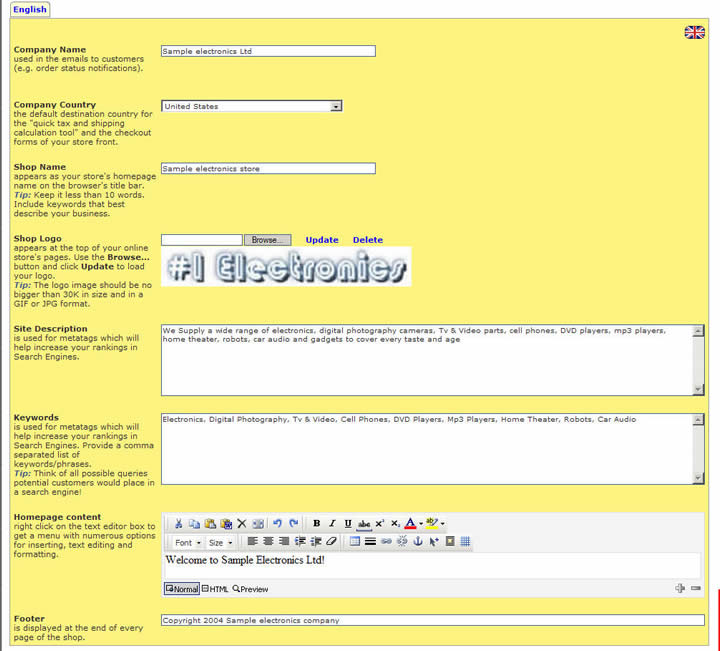
| Figure:
Setting up the basic,
language-depended information for an e-commerce store. |
Company Name:
Enter your company's name. This
will be used in the emails that will automatically be sent
to your customers once they have placed an order, as well
as in the emails notifying your customers about the status
of their order.
Company Country: Choose
the country your company is registered in from the drop down
menu. This will appear as the default country in the "quick
calculation tool" drop down menu and in the checkout
forms.
Shop Name: Enter the
name of your e-commerce store. This will appear as the homepage
name on your browser's title bar:
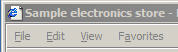
| Figure:
Shop Name will appear
as the homepage name on the browser's title bar. |
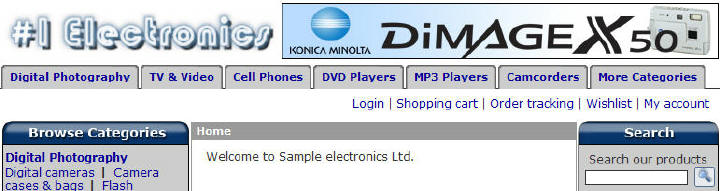
Shop Logo:
Use the browser button to load
your logo image. Make sure the image is 150-250 pixels long
(depending on the shape), no bigger than 30K in size and is
in a GIF or JPG format. This will appear at the top of your
e-store pages:

| Figure:
Shop Logo will appear
at the top of the e-store's front-end. |
Site Description:
In this field you enter the
description of your site that will be used in metatags. Metatags
are information embedded into the HTML source of a Web page.
Their purpose is to provide search engines with information
about the contents of a page and will achieve a higher ranking
of your e-store in search engines. Try providing as a complete
description as possible.
Keywords: In this field
you enter the keywords that will be used in metatags. Metatags
are information embedded into the HTML source of a Web page.
Their purpose is to provide search engines with information
about the contents of a page and will achieve a higher ranking
of your e-store in search engines. Provide a comma separated
list of keywords/phrases and try thinking of all possible
queries potential customers would place in a search engine.
Homepage Content: Use
this field to enter general information that will appear on
your e-store's homepage. This could be a welcome message or
a description of your e-commerce store.
The Magnet Commerce homepage content editor comes with many
of the powerful functionalities of known desktop editors (text
editing and formatting, insert options etc). You can use the
powerful toolbar provided or right click on the text editor
box to get a menu with numerous options for inserting, text
editing and formatting. For example, using the insert tab,
you could insert images, videos, pdf documents etc.
| Figure:
Homepage Content will
appear at the e-store's front-end homepage. |
Footer:
Enter the text that you want
to appear at the bottom of every page of your e-store. Keep
this short.
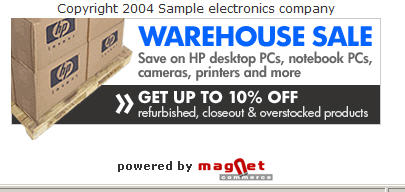
| Figure:
Footer will appear
at the bottom of the e-store's front-end homepage. |
General
settings common for all languages:
The second section in the general settings page
will be used for settings that are common for all languages.
This section consists of 2 parts: one for defining your email
addresses, weight unit and thumbnail properties and another
for enabling more than one currency for your online store.
The first part looks as follows:
| Figure:
General store settings,
common for all languages |
Sales Email:
Enter the mail address/addresses
that the sales notifications will be sent to. Use semicolons
to separate multiple addresses. The first of these addresses
will also appear as the sender in all emails sent to the customers
(order status notifications, newsletters, password reminders
etc.).
SMS Notification Number: Enter a mobile
phone number where you will be receiving new order notifications
via SMS. The number format to use is: Country Code + Area
Code + Phone Number, for example: 447799999999 for the UK
or 19080808080 for the USA. Please note that you will need
credits for this service. To purchase credits use the link
indicated.
Weigh Unit: Enter the
Weight Unit you want the weight of an order to be in.
Thumbnail Size: Enter
the size of the Thumbnails (these will be automatically created
from the original image). Thumbnails appear in pages showing
category lists, search results etc. The first field refers
to the width and the second one to the height of the Thumbnail.
Be careful not to insert a value exceeding 175 pixels!
Mini Thumbnail Size: Enter
the size of the Variants Thumbnail (these are used to show
the variants of a product or related products at the side
of a product's page). The first field refers to the width
and the second one to the height of the Thumbnail. Be careful
not to insert a value exceeding 50 pixels!
 |
About Thumbnails
and Mini Thumbnails:
When uploading a product image, two smaller versions of
this image are automatically created: Thumbnails and Variants
Thumbnail.
-- The original image is used on product pages, if such
a setting is defined, and in pop up windows showing the
product when clicking on a product's Thumbnail.
-- Thumbnails appear in pages showing category lists,
search results etc
-- Mini Thumbnails are even smaller than Thumbnails and
are used to show the variants of a product or related
products at the side of a product's page. |
! If
you redefine the size of Thumbnails or Mini Thumbnails, the
size of images already added will not change. The new sizes
will only apply to the images you will be adding after the
change is saved.
Thumbnail Quality:
Enter the quality of the Thumbnails
to be sent. This is a percentage of the initial Thumbnail
quality. The lower the percentage, the faster you will download
and view the images.
Enable Reviews / Rating:
Enable the product review and rating functionality on
all your store's product pages.
Allow Backorders: Allow
your customers to order your products even if they are out
of stock. If you allow backorders and a product is out of
stock, its stock status appears as "Backorders allowed"
on the storefront.
The second part is used
for enabling currencies for your online store:
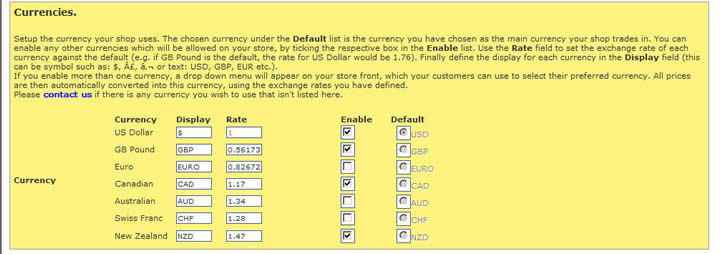
| Figure:
Enabling currencies
for your e-store |
The multi currency functionality will
increase user friendliness by allowing your customers to choose
a currency for your e-store!
To set this up you will first need to let us now of your preferred
default currency (choose any of the following: US Dollar,
GB Pound, Euro, Canadian Dollar, Australian Dollar, New Zeeland
Dollar or Swiss Franc). This will be shown as the chosen currency
under the Default list. You can then enable any other
currencies you would like to include on your e-store by ticking
the respective check box in the Enable list. Additionally
use the Rate text boxes to set the exchange rate of
each currency against the default one and define the display
for each currency in the Display box.
! Whether
you are using the multi-currency functionality or just the
default currency on your store front, the default
currency must remain enabled (the enable box of
your default currency must be ticked at all times)!!
When all general settings are defined
click on "Update Setup" to apply your changes to
your online store.
Having enabled the currencies shown in
the previous figure, the following drop down menu will appear
on you online store. Your customers can choose any of the
currencies available for viewing the product prices and performing
an order.
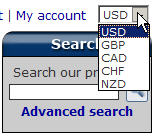
| Figure:
Multi-currency feature
on the store front |
Summary:
 To
setup the basic features of your homepage go to the General
settings page by choosing "Setup > General" in the Administration
Panel . To
setup the basic features of your homepage go to the General
settings page by choosing "Setup > General" in the Administration
Panel .
Define the basic
language depended features of your homepage (Company Name
and Address, Site Logo etc.) by filling in the first form
in the General settings page.
Fill in the second
form for defining general settings common for all languages.
Here you can define the email address/addresses that new order
notifications will be sent to, the size and quality of the
image thumbnails and the weight unit that will be used to
explain the order.
Use the third form
to enable more that one currency for your online store.
|