Newsletter
With Magnet Commerce you can organise a
newsletter campaign to keep in touch with your subscribers
and further market your products. All you need to do is compose
the content of the newsletter using the advanced editor provided
and then send it to all your newsletter subscribers with the
click of one button!
To compose and send a newsletter click on the
"Marketing > Newsletter" tab of your Administration
Panel:

| Figure:
Use the "Marketing
> Newsletter" tab in the Administration Panel
to compose and send a newsletter to your subscribers. |
Composing a newsletter:
The newsletter page is split in two sections:
A text box for defining a title and an editor for composing
the newsletter.
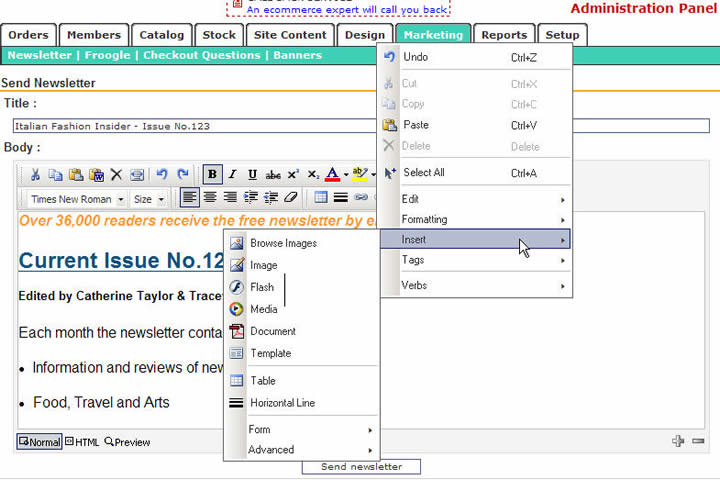
| Figure:
Composing a newsletter:
Right clicking in the text editor box gives a menu with
numerous options for inserting, text editing and formatting |
Title:
Provide a title for your newsletter. This will also be the
title of the email that will be sent to your subscribers.
Body:
Compose your newsletter using the powerful context editor
provided.
The editor comes with many of the powerful functionalities
of known desktop editors:
• The advanced toolbar contains buttons
for:
All common editing commands: "cut", "copy",
"paste", "paste from word", "delete",
"full page", "undo and redo" actions:

Text formatting options: "bold",
"italics", "underline", "strikethrough
line", "superscript" and "subscript
text", "font color", "highlighting",
"size" and "type of fonts", "text
alignment", "indent" and "outdent text"
and "remove format":
 
Insert options: "table" insert,
"horizontal line" insert, "hyperlink"
insert and delete, "anchor" insert. Also "select
all", "position absolutely" and "visible
orders" buttons are available:

• Alternatively, right clicking
in the text editor box gives a menu with numerous options
for inserting, text editing and formatting. For example, using
the insert tab, you could insert images, videos, pdf documents
etc.
• You can also view or edit the html code
of the article by choosing the html view button, at
the bottom of the editor, and check the article layout using
the preview button.
Sending a newsletter:
Once you have finished composing your
newsletter, click on the "Send newsletter" button
to send it to all your newsletter subscribers.
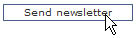
| Figure:
Click on the "Send
newsletter" button to send the newsletter to all
your subscribers. |
! Use the
"Members
> View" tab of your Administration Panel to see
whether a subscriber of your store is entitled to receive
your newsletters.
Store Front:
How can store visitors subscribe
to your newsletter:
There are two ways that a visitor of
your online store can subscribe to your newsletter:
Newsletter subscription
box: You have the
choice of adding a newsletter subscription box to the right
bar of your store pages (simply choose one of the layouts
containing the newsletter box from the "Design > Layouts
> Right Bar" drop down menu).
In this case a store visitor will automatically become a newsletter
subscriber by providing his/her email and pressing the "+"
button.
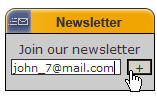
| Figure:
A newsletter subscription
box on your store front can be used by store visitors
to subscribe to your newsletter. |
Checkout process:
When completing an order your customers are given the option
to subscribe to your newsletter by ticking the appropriate
check box.

| Figure:
A customer has the
option to subscribe to your newsletter upon checkout. |
How can newsletter subscribers change
their account settings:
Members
of your online store can change their account settings at
any time, including their newsletter subscription. Once logged
in to your online store, they can access their account information
by clicking on "my account":

| Figure:
Your store members
can access/edit their account information by clicking
on "my account". |
This takes them to the "Member Details"
page where they can change their newsletter subscription settings
- as well as all other settings of their account:
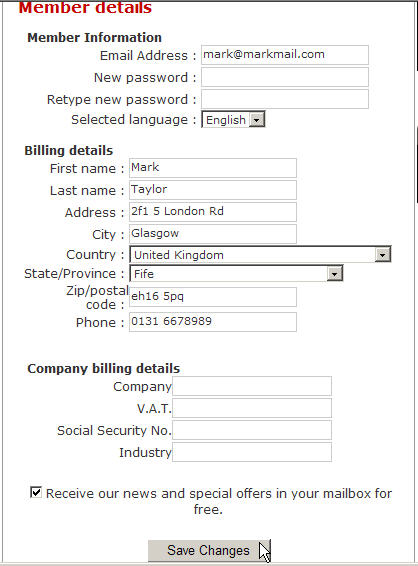
| Figure:
A store member can
change his newsletter subscription as well as all other
account settings. |
Summary:
 Use the "Marketing
> Newsletter" tab in the Administration Panel to compose
and send a newsletter to your subscribers. Use the "Marketing
> Newsletter" tab in the Administration Panel to compose
and send a newsletter to your subscribers.
A powerful editor is provided
for composing a newsletter. Once this is done, the newsletter
can be send to all your subscribers with the click of a button.
Store Front: Your store
visitors can subscribe to your newsletter during checkout
or by use of the newsletter subscription box. All store members
can change their newsletter subscription settings at any time
by accessing their account details.
|